
Doesn't everyone eat Dhansak on Sundays?
And how you can make Dhansak in seven not-so-easy-but-totally-worth-it steps if you don't
I’m nine years old. The six spicy tangy lamb kebabs I ate a few hours ago for breakfast were not enough; I’m hungry again. I already know what’s for lunch this Sunday – it’s always the same. It has been for the last 246 Sundays.
I’m joking. I haven’t been keeping count. But I know Mum’s making dhansak, a traditional Parsi meat and lentil stew served with caramelised rice. Again.
As I come to my favourite section of the Sunday Mid-Day, the horoscopes, I can smell the thick, spicy dahl bubbling on the stove. There’s a faint meaty aroma in the air, which means Mum’s opened her pressure cooker and is busy poking the chunks of goat meat to see if they fall apart. Grandpa stands by the dining table, picking away the seeds from our watermelon sherbet.
And Dad? Dad’s making kachubar, a tangy onion, tomato and cucumber salad. He’s also trying hard to engage me in a debate about onions tasting better when thinly sliced versus finely chopped. I roll my eyes. Who cares?
Does everyone in the world also eat dhansak every Sunday? Surely they must be bored of it by now like I am.
But despite my ennui, I always have seconds
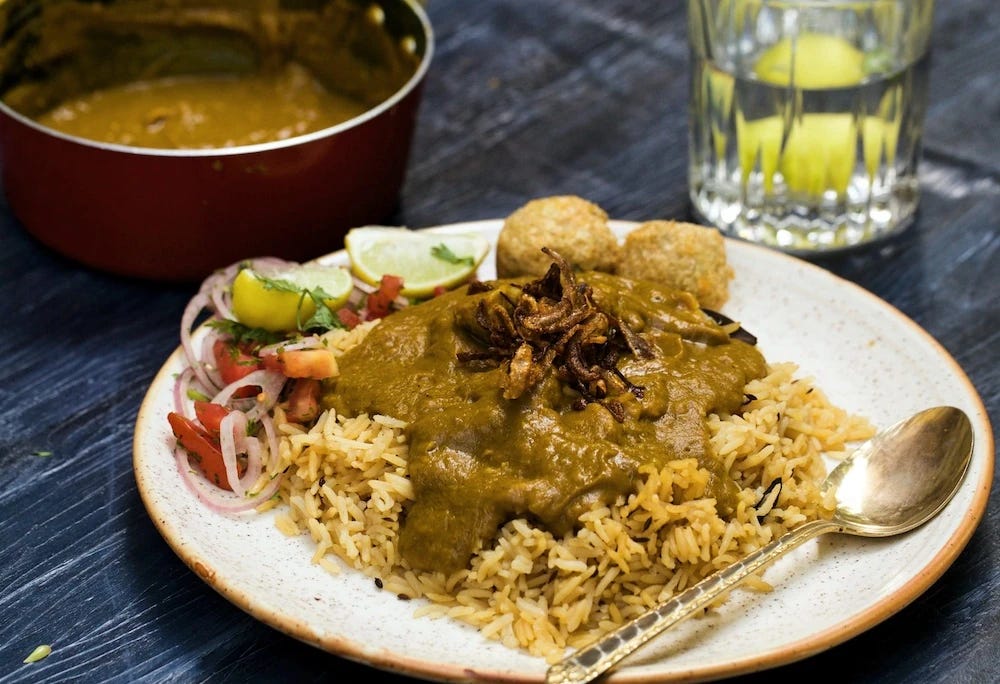
For my first serving, my plate is full of long grains of basmati rice caramelised with jaggery. On top of the rice is a puddle of thick dahl with four pieces of goat meat. On the side is Dad’s kachubar. Granny tries to force her boiled beetroot onto my plate, but I always fill it up so there’s no space.
Time seems to slow right down as we all dig into our dhansak. It’s total silence as we have those first few bites. The dahl is spicy, though the tang of the kachubar helps.
Granny hates how I eat my dhansak seconds. I fill my bowl with just the dahl and then scoop it into my mouth using the dry lemon peel. The British left India when she was in her teens but still, her colonial sensibilities are offended that I’ve ditched the fork and spoon for my hands. I’m too busy slurping it up to notice.
As we clean up, Mum smiles and pokes my back. “I thought you were so sick of dhansak that you can’t eat another plate?” she says. I shrug happily and go to lie down on the bed beside Dad. Somehow, my Sunday nap is much better after a plateful of dhansak.
Every Sunday is the same. Until I turn 13, and my parents get divorced.
Mum and I moved cities, dad moved to some other part of Mumbai I had never seen, and suddenly, just like that, Sundays were not about dhansak any more.
Throughout the next eight years of living alone with Mum, I ate many different Sunday meals. Fish curry when Mum was missing her mother, potato and cheese sandwiches if she was tired, or a platter of leftovers if the fridge needed clearing.
The teenage me felt like slapping my eight-year-old self. Of course the whole world didn’t eat dhansak on a Sunday. What was I thinking?
On the occasional Sunday when Mum cooked dhansak, she’d talk about our forgotten tradition, tell stories of her as a new bride struggling to understand the Sunday dhansak ritual. Other times, she’d wistfully remember Dad hugging her from behind as she added the meat to the dahl.
As I was getting dressed for my wedding day, Mum said, “Beta, I hope your in-laws don’t eat dhansak every Sunday as mine did. But if they do, learn to adjust, OK?”
Thankfully, there was no Sunday dhansak tradition in my new home. A good thing, considering I didn’t even know how to make it!
The first time I tried making dhansak, it was a total disaster.
I thought all my years of eating it would mean I could cook a perfect one. But I rushed it. I put all the meat, vegetables, and dahl together in the pressure cooker. The result? A pot full of brownish water, with burned meat and vegetables floating around in it. I had to work on my technique.
As a Parsi, Dhansak is fused to my identity. In the same way as you might see an Indian and think of butter chicken, when I told anyone I was a Parsi they asked me to cook them dhansak.
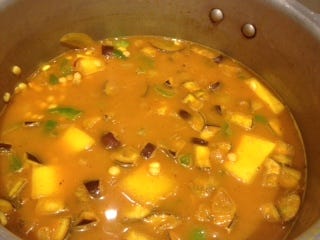
It took many tries to learn how to make a decent Dhansak. One of my first lessons was that it’s better to cook the meat first, and then use the stock to cook the dahl. The final dish is more satisfying when vegetables like pumpkin and aubergine are added. I learned to resist the temptation to make Dhansak an hour before I had to serve it because it’s a labour of love. When the dahl has been soaked, the meat marinated, and the whole dish slow-cooked, the result is 100 times better.
But it took years for me to learn that what separates a good Dhansak from an exceptional one is the Dhansak masala, the core spice that goes into the dahl.
The recipe for Dhansak masala is a closely guarded secret
So well protected by our grandmothers and aunties that few Parsis know how to make it. It’s an all-in-one spice blend that contains half an Indian shop’s worth of spices, with the main notes being earthy cumin, zingy coriander, and woody cinnamon with a hint of chilli. While Dhansak lovers in India can find the masala in Indian spice stores, that’s not the same for us in the diaspora.
When a close friend gifted me her grandmother’s dhansak masala recipe, I didn’t understand the treasure I was receiving.
Having cooked more than 5000 litres of Dhansak as a caterer – with a store-bought spice blend, gasp! – in India, I wasn’t sure I’d ever want to eat the dish again, let alone make Dhansak masala from scratch.
But as my children reach the age where they sit in a chair long enough to finish their meal, I feel called to create new family traditions that are uniquely ours. If I can convince my children to marinate the meat and make the rice, and my husband to chop the kachubar, then perhaps our new tradition will be an afternoon meal dedicated to dhansak.
There’s something very comforting about cooking and eating a dish my parents, grandparents and great-grandparents all grew up eating, mainly on a Sunday.
What is Dhansak?
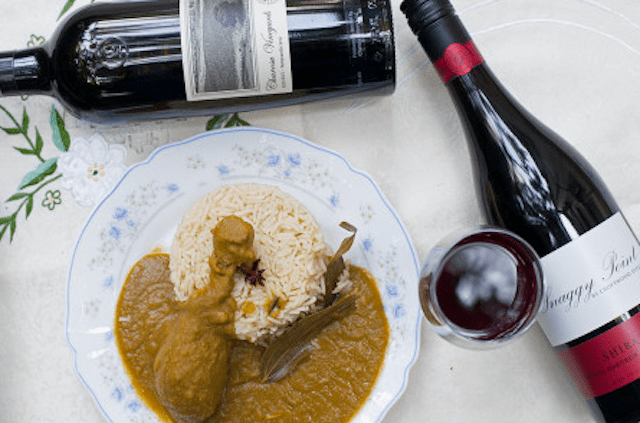
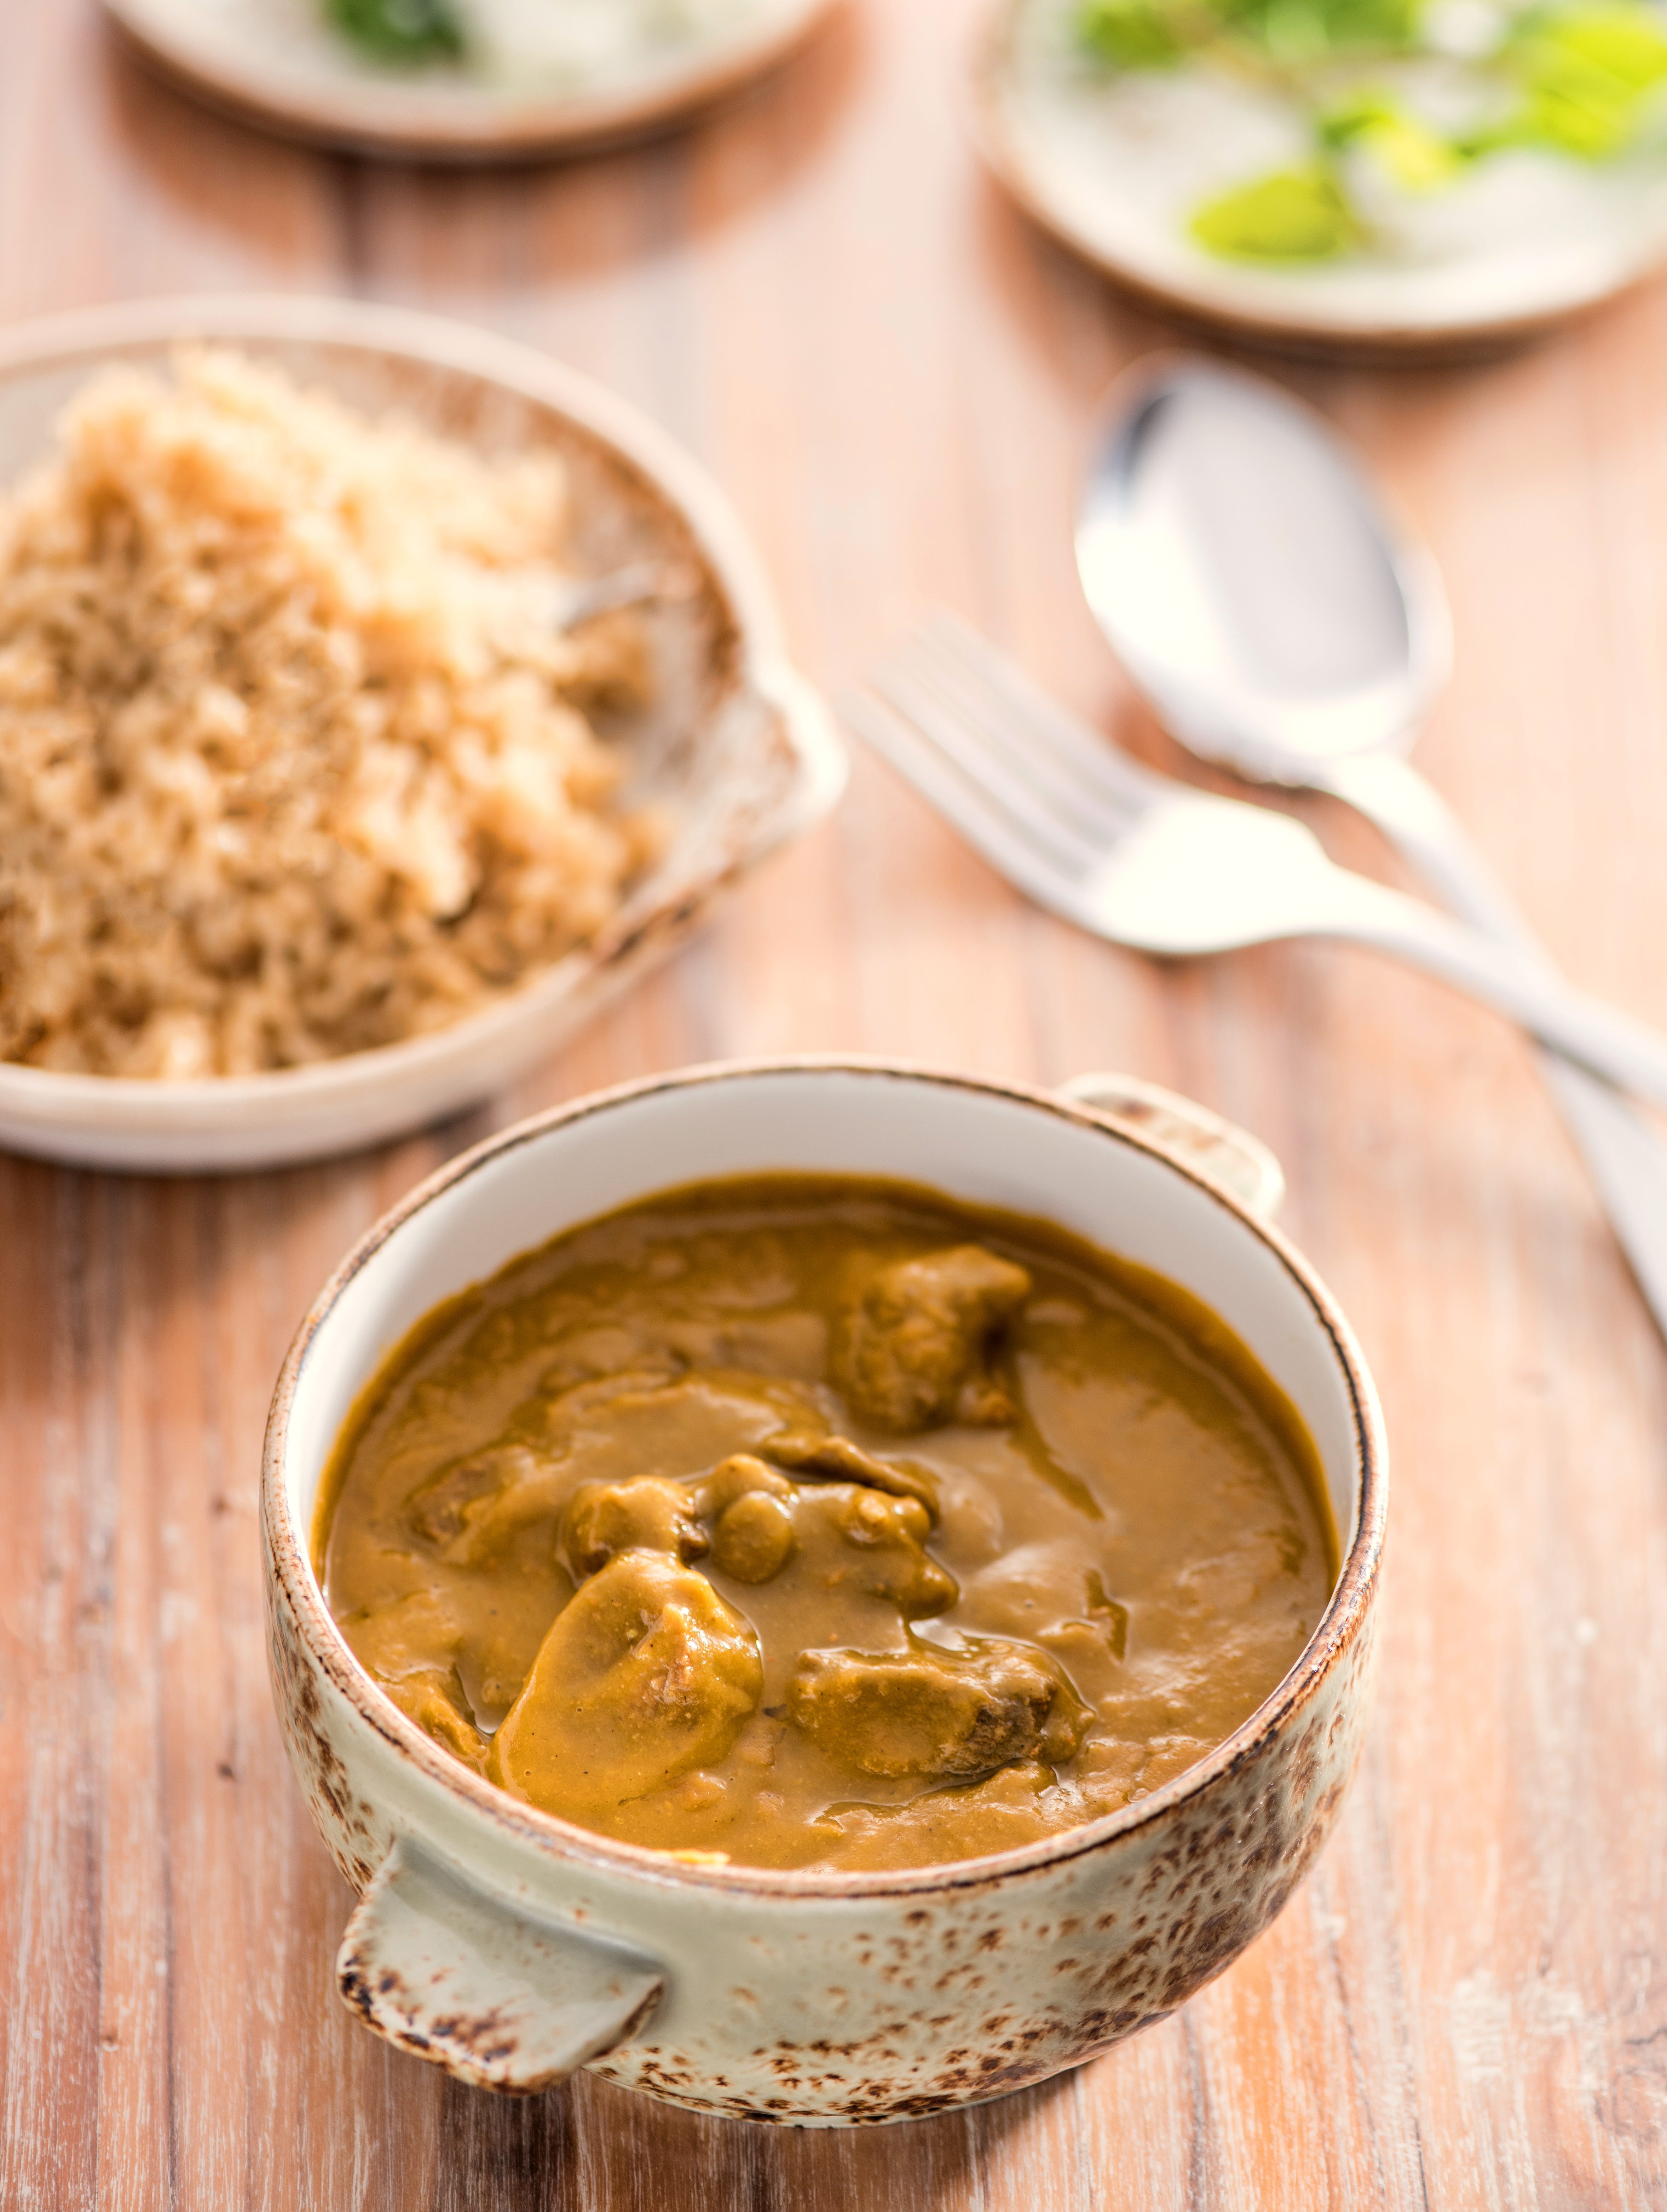
At its core, Dhansak is a spicy dahl made with meat and a few vegetables which is all slow-cooked together and served alongside sweet(ish) “brown rice”. The rice is not actual brown rice but rather, white rice that has been caramelised with jaggery.
For reasons unknown to me, Dhansak is very popular at curry houses in the UK. However, that Dhansak is made with what Parsis would consider bizarre ingredients like pineapple, pomegranate, and tamarind. It’s also weird that the British refer to the dish as Dhansak curry because it falls in the dahl category! I’ve also heard rumours of a Dhansak burrito that’s available at Marks & Spencer but the idea of our iconic dish wrapped inside a cold, limp, tortilla is enough to give me nightmares so we will not speak of this further.
The small size of our community (only 150,000 globally) means there are few Parsi restaurants. The best place to find a good plate of Dhansak therefore is at a Parsi’s home. However, if you don’t have a Parsi friend or colleague, some restaurants serving Mumbai-focused food serve the dish too such as Mumbaiwala in Auckland and Sodabottleopenerwala in Mumbai. If you’ve seen it on the menu somewhere else in the world, let me know!
Why can’t I eat Dhansak on a happy occasion?
Firstly, this is a bit of a myth. Parsis DO eat Dhansak every Sunday AND on happy occasions like birthdays, new years etc.
However, we cheat.
The meat is cooked with the rice into a Mutton Pulao and the Dhansak Dal is served alongside it. Technically, if the meat is not cooked with the dahl then it’s not “Dhansak” but rather “Masala ni Dar” and that’s how we get around the rule of no Dhansak on a happy day.
The reason Parsis don’t eat Dhansak on auspicious occasions is because when a family member or close friend passes away, we abstain from eating meat for four days. On the fourth day when the soul is believed to finish it’s accounts on earth, we return to normal life (and to eating meat) with a feast - kind of like a memorial ceremony - with Dhansak.
Make Dhansak at home - for six
Warning: The reason we normally eat Dhansak on a Sunday afternoon is because it takes the better part of the morning to prepare. But it’s all worth it! The recipe below mentions cook times inside a pressure cooker. You can make this in an Instant Pot too and it tastes best if you go with the slow cooker but remember to adjust the dahl cook times accordingly.
Ingredients
Meat
1 kg meat - lamb, goat, beef or chicken
1 tbsp ginger paste
1 tbsp garlic paste
Salt to taste
Rice
250 gm Basmati rice
50 gm jaggery (or raw sugar if you absolutely can’t find jaggery)
2 tbsp ghee/oil
2 bay leaves
4-6 cloves
2 star anise
2 tsp cumin seeds
Salt to taste
Dal
3 tbsp ghee/oil
100 gm toor dal (yellow pigeon peas)
50 gm moong dal (yellow lentils)
50 gm masoor dal (orange lentils)
1 small onion, finely chopped
75 gm peeled pumpkin, chopped
50 gm small brinjal, chopped
1 tbsp fenugreek leaves
3-4 tomatoes (about 200 gm), canned will do too
10-12 curry leaves
1 tsp turmeric powder
1 tsp red chilli powder
2 heaped tbsp Dhansak masala**
Method
Source a good Dhansak masala (read below on what to do if you can’t find it)
Start by soaking the dahl in a mixing bowl and chilling the beer
Cook the meat first
Marinate the meat with salt, ginger paste, and garlic paste. Keep aside for an hour.
Cook the meat in an instant pot or pressure cooker with about a cup of water until completely tender - about 40 minutes.
Now make the tadka (spice tempering) for the dahl
In a saucepan, heat the ghee until sizzling
Pop the curry leaves until they crisp, add in onion, and allow the onion to brown
Next, add in the tomatoes, pumpkin, brinjal and all the spice powders. Cook for 5 minutes. If the mixture turns dry, add in some water and cook another 5-10 minutes. You want the pumpkin to be almost tender and the brinjal to be cooked completely
Remove the mixture and blitz in a blender or food processor until smooth
Next, we make the dahl
Rinse the soaked dahl completely and add it into a pressure cooker/instant pot or slow cooker
Add the tomato spice paste from before and all of the meat stock
You may need to add in some water - you want the water to be about one knuckle higher than the level of your dahl
Cook the dahl until it completely breaks down - about 40 minutes in the pressure cooker
Add salt to your taste
Using a hand blender, blend the dahl into a smooth, brown, gravy
Add all your cooked meat into the dahl and allow everything to simmer for another 15 minutes
While the dahl is simmering, make your brown rice
In a saucepan, warm up the ghee until sizzling hot
Add in the whole spices - cloves, bay leaves, star anise and cumin - and cook for a minute
Turn the heat on medium and add in the jaggery. If you don’t have jaggery, you can do this with raw sugar too but it will not taste as good.
When the jaggery turns golden brown and molten, mix in your raw rice and then add in 2-3 cups of water. Careful: the addition of cold water to the jaggery will cause angry splatters and sounds.
Allow the rice to cook - about 20 minutes.
When the rice is tender, strain everything into a colander. Your rice should be a beautiful caramelised brown.
Make your kachumber (onion salad), cut up some lemon wedges and set the table
Pile up your plate with the rice, dal on top of the rice, squeeze the lemon juice and enjoy
What do I do if I don’t have Dhansak Masala?
Your Dhansak Masala is really going to make or break your Dhansak. While the masala is easy to find in India, outside of India it’s one of those few blends that Indian shops don’t always stock.
If that’s you, here’s a few options:
On Amazon, search for Mangal, Badshah or Ahura Dhansak Masala
If you’re in New Zealand, buy Dhansak Masala from Dolly Mumma
Make your own cheat’s blend using the method below:
50 gm coriander powder
25 gm cumin powder
50 gm garam masala
5 gm red chilli powder
Mix it all together until combined
Please note this will not give you an exact Dhansak masala but it’s the fastest way to make the blend with easily available spices.
Have you eaten Dhansak before - share your favourite memory with us.
Family customs can evolve and change but the rituals remain integral to our values and memories. Growing up we ate different dishes on Sunday...but we always had a large hot meal at 1pm. "Dinner" on Sunday was more of a light meal, snack. I miss that practice and this article had me thinking I might bring back a main meal on Sunday afternoon. Thank you, I did not know what Dhansak was but it sounded delicious.
My local Indian restaurant/takeaway (Tandoori Heritage in Wellington - best Indian restaurant I've ever been to) has Dhansak on the menu so I have had it a number of times. It's delicious. I had no idea it was such a culturally significant dish, so fantastic to hear the story. I shall appreciate it a lot more from now on.